When you start with your web hosting subscription, there are a few essential steps to configure your domain correctly. This guide will walk you through the initial setup process.
Step 1: Find Your Dedicated IP Address
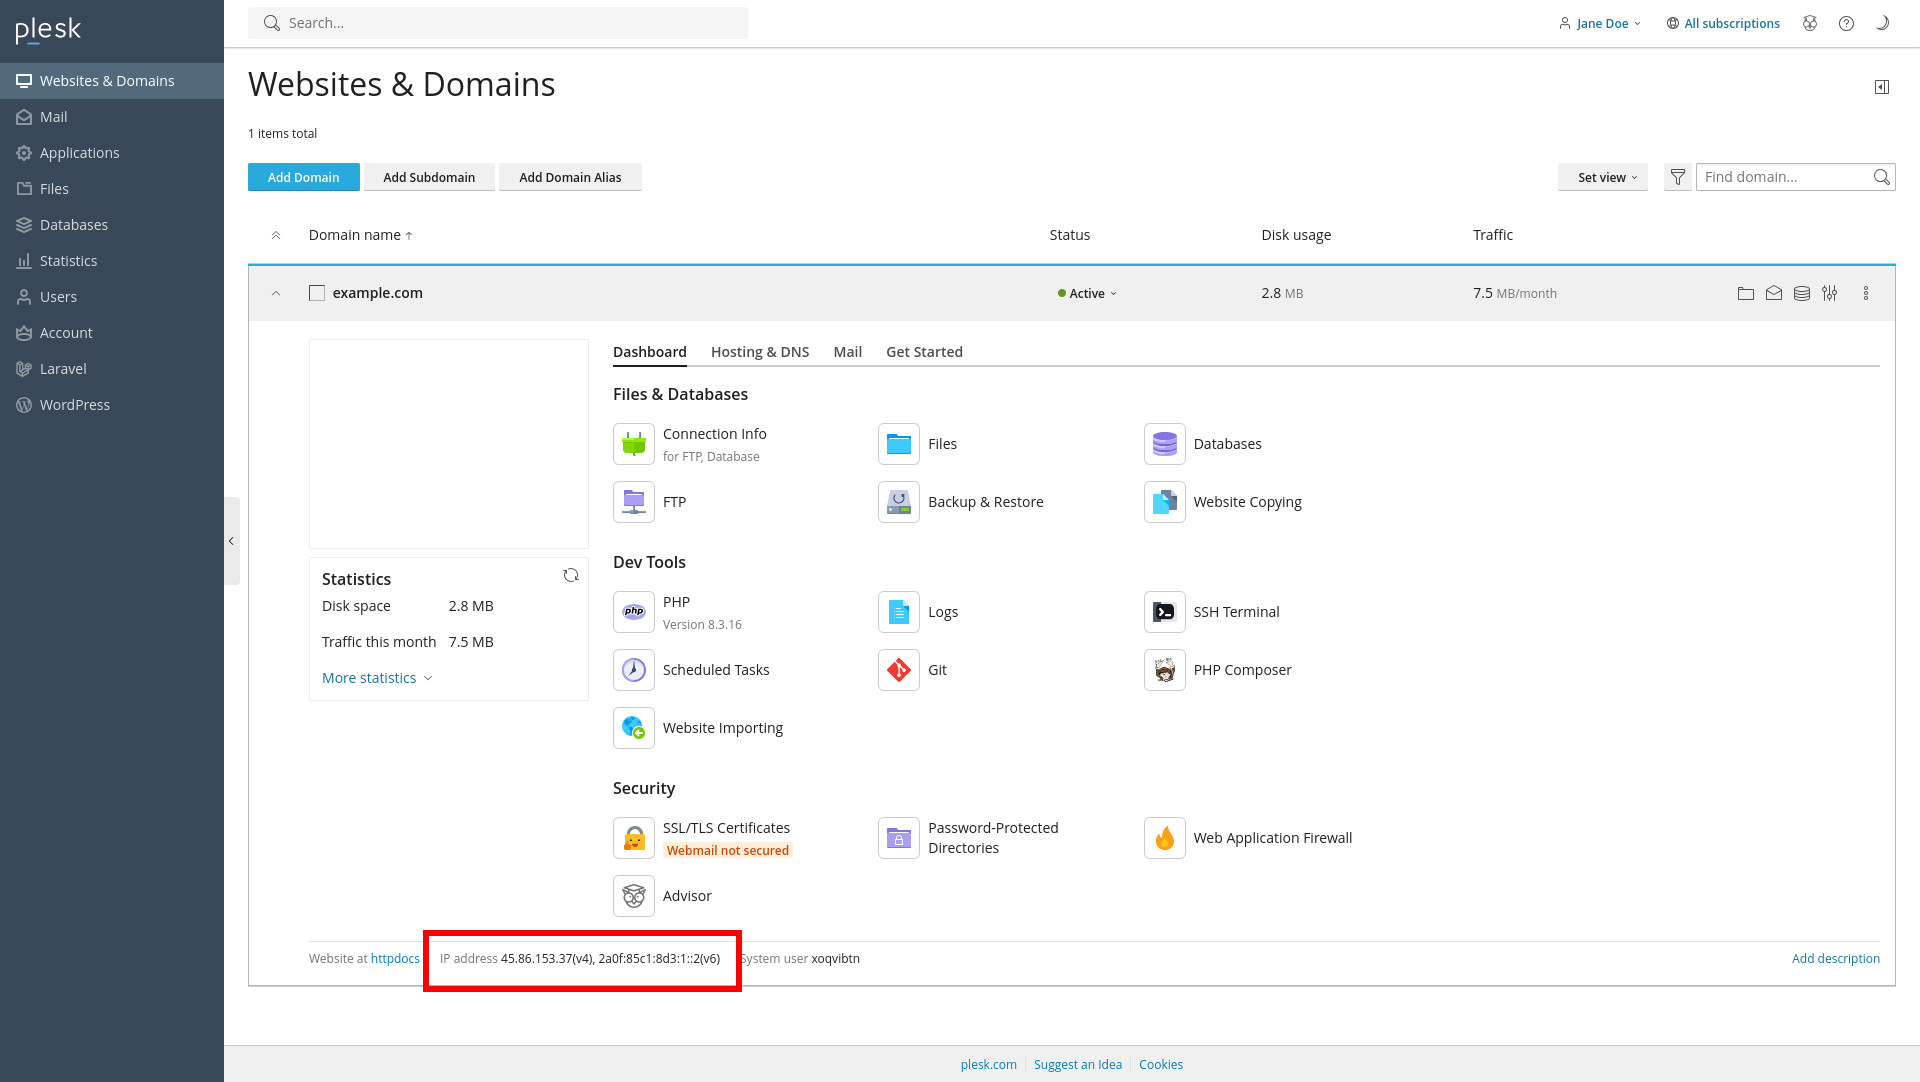
Each web hosting subscription comes with a set of dedicated IP addresses that are exclusively assigned to you. These IPs are necessary for setting up your domain's DNS records.
To locate your assigned IP address:
-
Log in to your Webhosting/Plesk account.
-
Navigate to your domain details.
-
Look at the bottom of the domain details section where your assigned IP address is displayed.
Step 2: Configure Your DNS Records
Once you have your dedicated IP address, you need to configure your DNS records with your domain’s DNS provider. The exact process may vary depending on your provider, but the essential DNS records to create are as follows:
| Record Type | Hostname | Value (Example) | Purpose |
|---|---|---|---|
| A | @ (Root) | Your Dedicated IP | Directs the domain to your web server |
| A | www | Your Dedicated IP | Enables www subdomain |
| MX | @ | mail.yourdomain.com | Handles incoming emails |
| CNAME | yourdomain.com | Mail server alias | |
| TXT | @ | v=spf1 mx ~all | Email sender verification |
| TXT | _dmarc | v=DMARC1; p=none; | Email fraud prevention |
| TXT | _domainkey | DKIM public key | Email authentication |
Note: Some of these records (such as MX, SPF, DKIM, and DMARC) are only necessary if you are using the built-in email hosting provided by your web hosting package. If you use an external email hosting provider, you should follow their DNS setup instructions instead.
Step 3: Secure Your Website with an SSL Certificate
After setting up your DNS records, it is crucial to secure your domain with an SSL certificate.
How to Add an SSL Certificate in Plesk:
-
Log in to your Plesk account.
-
Navigate to the Security section.
-
Click on SSL/TLS Certificates.
-
Choose one of the following options:
-
Upload an existing SSL certificate (if you already have one).
-
Request a free Let’s Encrypt certificate by selecting Add Let’s Encrypt Certificate.
-
-
Follow the on-screen instructions to complete the SSL setup.
Final Steps
-
Allow some time for DNS propagation (this can take up to 24 hours).
-
Verify your website is resolving correctly by visiting your domain.
-
If using email, test sending and receiving emails to confirm the setup.
Congratulations! Your web hosting package is now configured and ready to use.